Devso Blog
Latest news and developments from Devso, including progress updates on the development of Crash Catch (https://crashcatch.com) and future projects
CritiMon - Advanced Crash Management (Part 4)
Chris Board
Jan 27, 2019 • 5 min read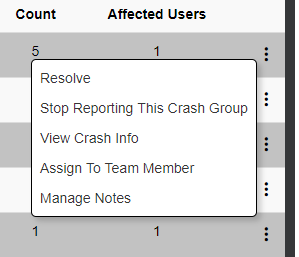
This is the fourth post regarding our new crash monitoring platform "CritiMon", coming as an early access previous in Q1 of 2019. In the last post we explored registering your application, and then the basics of viewing and managing your crashes. In this post will be showing the more advanced crash management such as development notes, assigning crashes to team members, and ability to stop reporting on crashes.
So you've registered your application, and you've now received some crashes and want to manage them. Below is the screenshot in the post we saw in the last post that should the crash group details, including information such as time first occurred, time last occurred, the exception type, e.g. NullPointerException, and exception type, e.g. Handled and Unhandled.
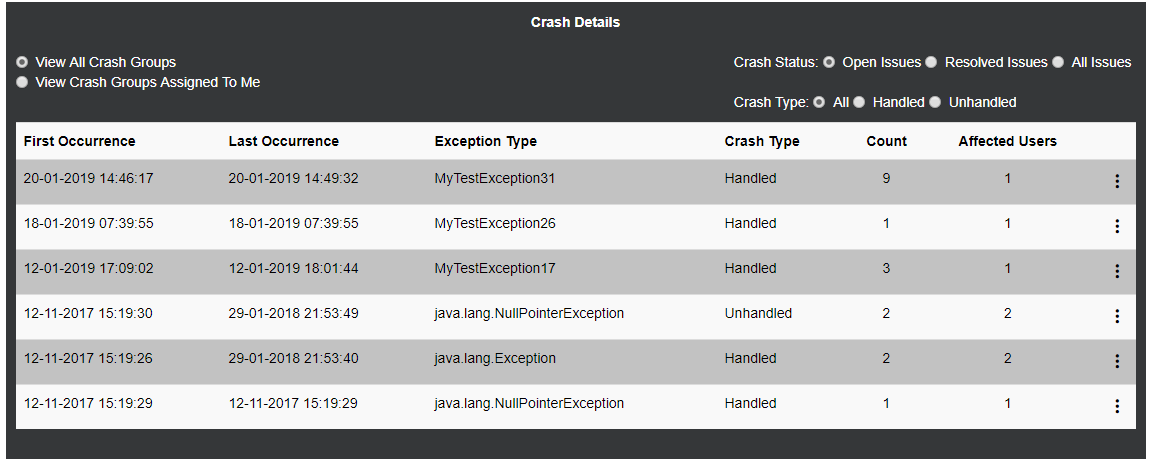
Crash Group Details
On the far right, is the crash group context menu (the 3 vertical dots). When you click this you will see the context menu appear as shown in the screenshot below.

Crash Group Context Menu
Hopefully its pretty clear what each menu does but we'll go through each item in detail.
Resolve Crashes
The first menu item will mark the entire crash group as resolved. You can mark each crash as resolved individually depending on your requirements. A crash is grouped by the exception type (e.g. NullPointerException) and the crash type (e.g. Handled and Unhandled). So you can technically have 2 crash groups for NullPointerException, one for handled NullPointerException and another crash group for unhandled NullPointerExceptions. A crash group will then link to one or more individual crashes. Each individual crash might be identical - i.e. they've all crashed from the same class and the same line no, therefore once you've fixed one, you fixed all of them so you can go to the crash group and then mark the entire crash group as resolved. However, you might be receiving multiple different crashes for NullPointerException but under different classes and/or different line numbers within your application. Therefore in this case, for each crash that you fix you might need to mark each individual crash as solved as and when you fix them instead of marking the entire crash group as resolved.
Stop Reporting This Crash Group
When you click on the "Stop Reporting This Crash Group" menu item you will be shown the filtering settings. But hang on, you might be saying, why would I want to stop reporting on crashes that I am getting? There's a couple of reasons. There are some crashes that you might get that are completely out of your control, for example on some Android app development, you can sometimes receive a crash from your own app, but it was a crash within the OS itself, this either might be to do with a bug of Android or a bug in the customised version of Android that the manufacturer uses or specific drivers that are being used by that manufacturer and their hardware, so although you might be receiving a crash like this, there's nothing you can do about it, so there's no point in it telling you. Another example might be that your app is utilising an external third party API which you might be receiving a timeout error, this could be either related to the API, or related to the users own network issue and/or network latency so again you probably won't be able to do anything about it. Another example, and hopefully, the more likely scenario, is you've resolved a crash you've been getting on version 1.0 of your app, and you've released your new app release as version 1.1. However, some users might not update your app straight away, so you therefore might continue to receive crashes for your old version. Therefore, to stop them from being shown, you can filter out the crashes to stop reporting on crashes for specific versions and a select app version and below.
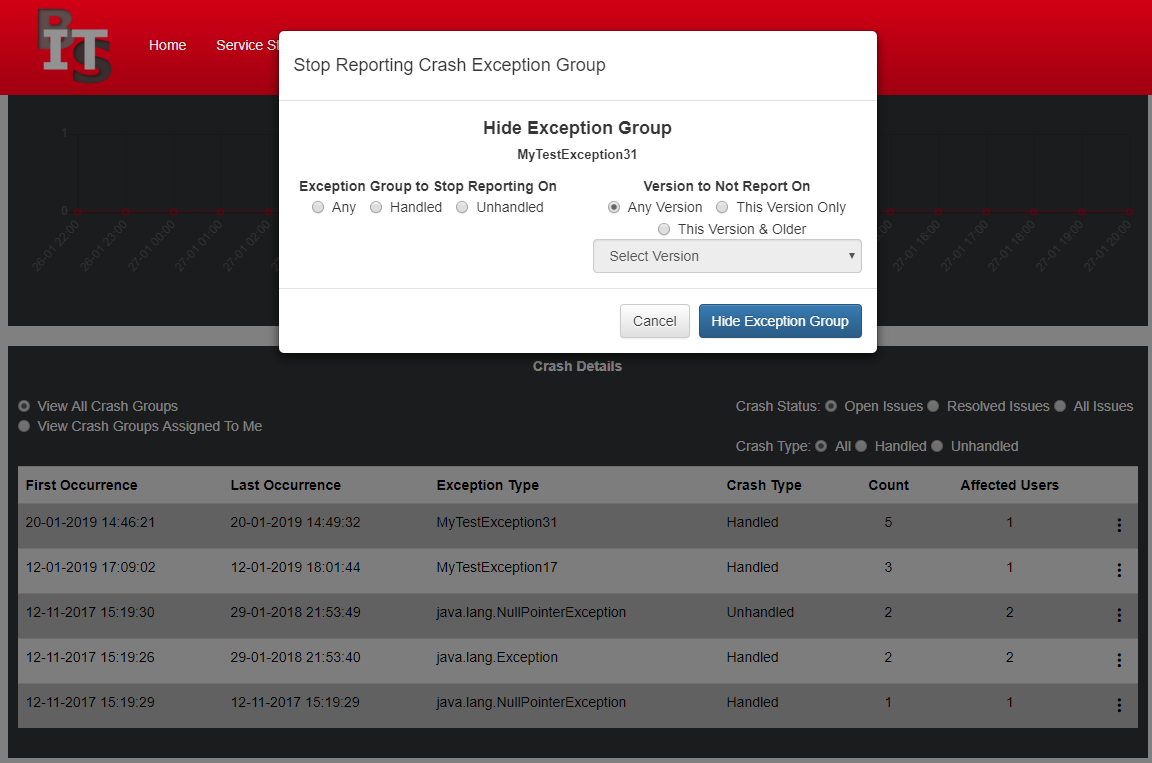
Hide Exception Group
As you can see from the screenshot above, you can filter out an exception group based on whether the crash was handled, unhandled or either, and filter out on any specific version, this selected version only, and this select version and older.
Once you've added a crash filter you can then manage it within the app settings (they'll be another post about that later on but below is a screenshot as a quick demo).
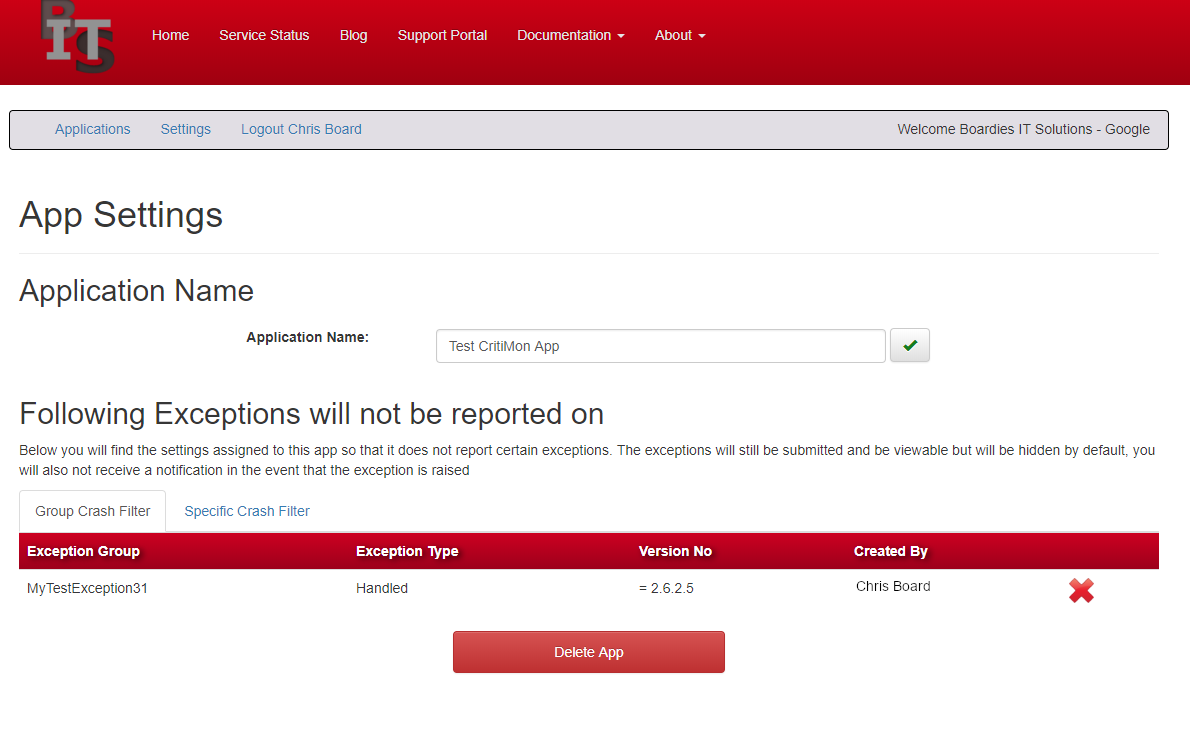
App Settings - Crash Group Exception Filtering
View Crash Info
The "View Crash Info" does exactly what it says on the tin, it takes you to the page to view the crash group where you'll see all individual crashes for a particular crash group.
Assign To Team Member
Assign to team member allows you to, well you guessed it, allows you to assign a crash group to a member of your organisation for investigation. When you assign the crash group to a team member they will receive a notification so that they are aware.
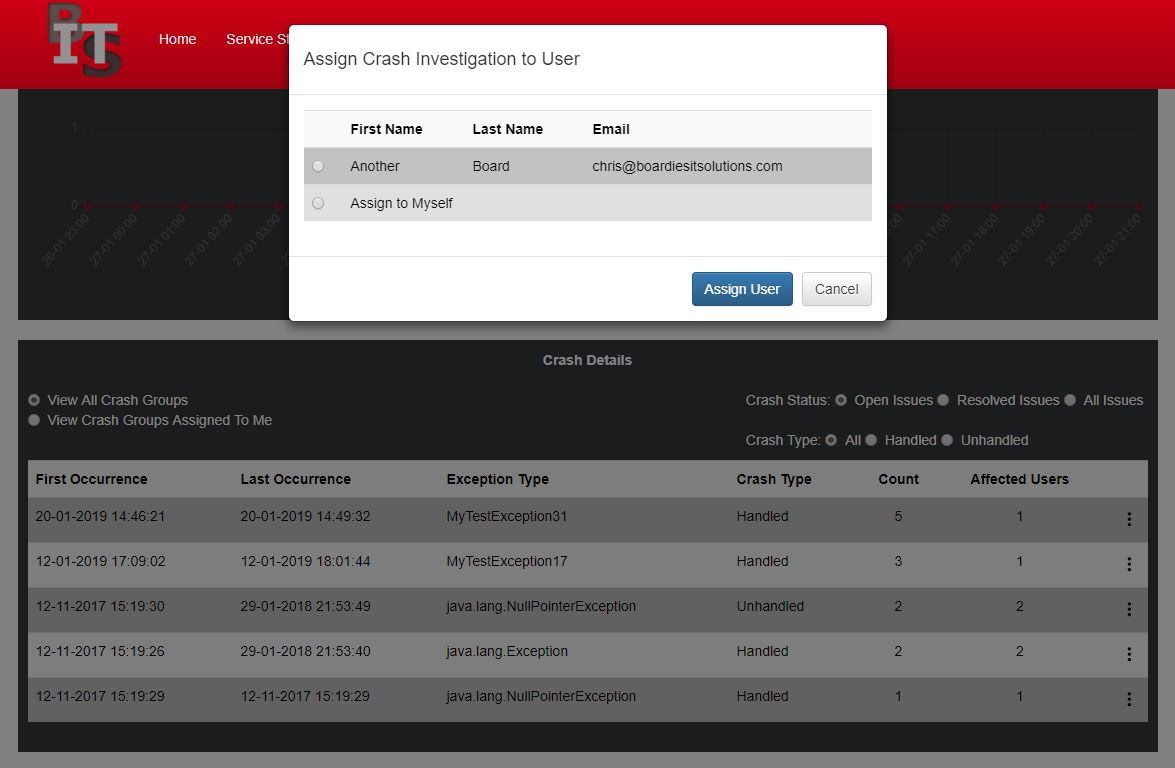
Assign to team member
Manage Notes
The note management menu item allows you to create notes regarding a crash group that is seen by everyone within your organisation. This can help you and your developers work together on resolving a crash by making notes on what you've found out and discuss ideas about the best way to implement a fix. You will also be able to @mention people within your organisation if you want one or more specific people from your organisation to be involved in rectifying the crash. (This bit isn't supported yet so so we can't demo the mentions but below is a screenshot of the notes).
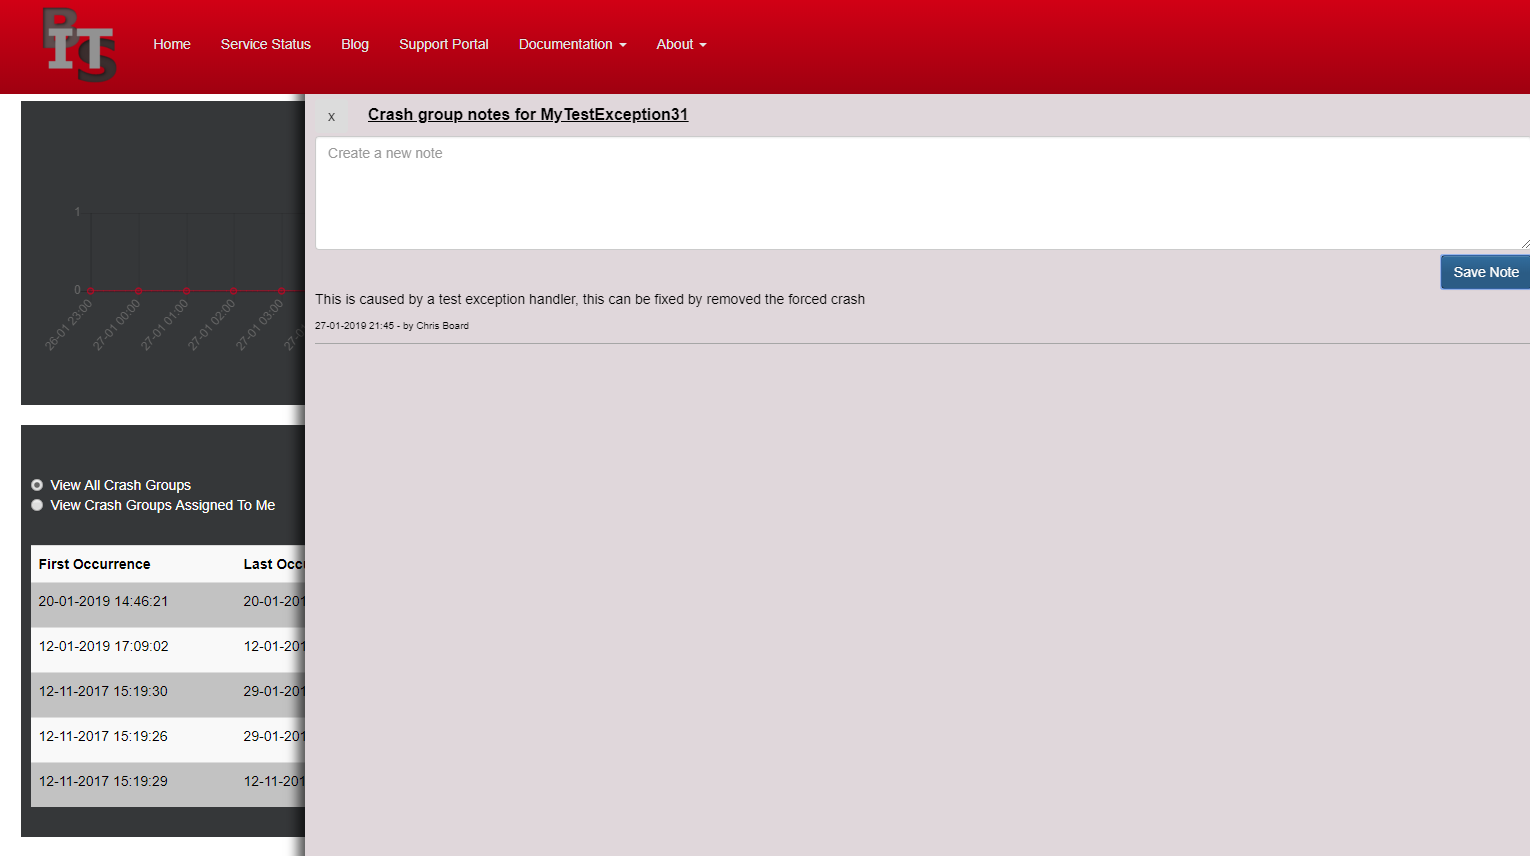
Note Management
That's it, when you view the individual crashes you will also see a similar context menu which will provide your the same functionality just only controlling that individual crash instead of the crash group.
Are you a developer or involved in Quality Assurance Testing or User Acceptance Testing, you might be interested in Test Track
A simple and affordable test planning and management solution.
Developed by Devso